Advanced Imaging Improves Armor Quality
Ruth A. Mendonsa
The development of "invincible" armor systems for ground vehicles, helicopters and personnel is a major thrust of the US Army Research Laboratory's Weapons Materials Div. at Aberdeen Proving Ground in Maryland. An advanced computed tomography (CT) imaging system is playing an important part in this endeavor. It assists in the Nondestructive Characterization of Armor Ceramics Program, which identifies and evaluates mission-critical armor systems including monolithic metals and ceramics, and advanced metal and ceramic composites.

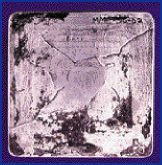
An advanced computed tomography scanner system allows the Army to identify discontinuities from less than 1 to several millimeters in SiC plates.
The Army previously used conventional film radiography to inspect and evaluate armor target assemblies. This method required hundreds or even thousands of radiographs taken from many orientations to fully map ballistic damage and deconvolute damage cracking modes, including radial, conical and laminar. Manual fusion of radiographic data was time-consuming and lacked accuracy and repeatability. Spatial resolution was not always adequate.
In its search for a more accurate and cost-effective technique, the Army acquired a BIR 600/420 CT scanner system from Bio-Imaging Research Inc. The system allows researchers to study the condition of armor target assemblies before ballistic testing and to analyze damage afterward. The system quickly and easily provides 3-D visualization of ballistic damage with excellent spatial resolution. The Army purchased this system because it was the most cost-effective and met all technical requirements for inspection and evaluation. It also will save time and money by greatly simplifying the inspection process and eliminating the need for film.
The BIR 600/420 imaging system features twin x-ray tubes with a microfocus x-ray source and real-time radiographic options. The microfocus source is for small field-of-view, high-resolution inspection. Spatial resolution of about 20 lp/mm can be obtained. The 420-kV source can penetrate 2 or 3 inches of steel and several inches of less-attenuative material such as aluminum. The largest manageable sample size is approximately 3 feet high by 2 feet in diameter.
In preliminary studies of encapsulated SiC plates in Al-SiC metal matrix composite blocks, researchers were able to determine the 3-D spatial location of the SiC plate within three metal matrix composite blocks. The scans also allowed them to identify such discontinuities as cracks, foreign objects and shrinkage cavities. The size of the flaws ranged from less than 1 to several millimeters.
Besides characterization and quality assurance, the Army plans to use the system to characterize actual impact damage for input and comparison with damage modeling predictions, and for reverse engineering of metal, ceramic and composite parts.
Published: September 1998