|
Tuesday, September 10, 2019
|
|

|
|
|
Join us for a FREE Webinar
Solving Challenges in Defect Inspection of Advanced Optics
Monday, September 23, 2019 1:00 PM - 2:00 PM EDT
|
|
Presented by
|

|
|

|
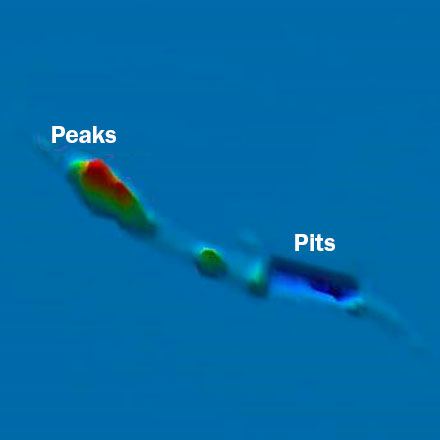
This webinar, presented by Bruker Corp., will discuss how a white-light interferometry (WLI) optical profiler performs precise, fully automated defect inspection of advanced optical components. The noncontact WLI technique uniquely combines subnanometer vertical resolution over mm2 large areas, enabling 100% inspection of high-quality optics through direct measurement of topography.
Presenter Samuel Lesko will explain how customized analysis can easily spot the most minute defects, even in cases of complex surface geometry, and how it automatically outputs critical information of detected defects (size, depth/height, orientation, location) without operator intervention or an etching step. This same measurement also allows accurate characterization of roughness along mid- and short-spatial wavelengths, complying to ISO norm 10110-7/8. The unique information afforded by this technology improves the understanding of the root causes for defects and allows further optimization in the polishing process to meet more stringent specifications.
Optical components such as lenses, mirrors, prisms, and windows undergo tight quality control to deliver optimal optical transfer function. Any scratch, dig, chip pinhole, or other defect will trigger wide-angle scattering of a light beam, reducing the quality of the end product. The number, type, and density of defects, as well as the percentage of defective areas, are assessed through well-defined quality control tests, such as the military standard, MIL-PRF-13830B. Inspection relies on direct or indirect optical methods such as the Schlieren method or differential interference contrast (DIC) to best reveal defects and rank them. However, these techniques are, at best, contour detection-based with often tedious manual operation or need for operator judgment. These techniques also fail to measure quality better than 10-5 (10-µm length, 5-µm equivalent diameter) or report accurate roughness, both of which are required for advanced optics used in gyrolaser navigation systems, high-power laser beams, extreme UV lithography tools, etc.
About the presenter:
Samuel Lesko, Ph.D., has over 18 years of optical profiler applications experience, particularly in using white-light interferometry in a wide variety of fields, from MEMS and semiconductor to optics and aerospace. Lesko obtained his doctorate in physics and his material science engineering degree at the University of Burgundy in France. He leads the applications development team for Bruker's Nano Surfaces Division in San Jose, Calif.; email: Samuel.Lesko@bruker.com.
Who should attend:
Engineers, researchers, QA and QC professionals, optical designers, and executives and managers concerned with inspecting and preventing defects in advanced optical components for a range of industries, including semiconductors and microelectronics, additive manufacturing, automotive, and aerospace.
About Bruker Corp.:
Bruker is the worldwide leader in 3D surface measurement and inspection, offering fast, noncontact analyses for samples ranging in size from microscopic MEMS to entire engine blocks. Bruker microscopes are the culmination of 10 generations of proprietary Wyko® Technology advances that provide the high sensitivity and stability necessary for precision 3D surface measurements in applications and environments that are challenging for other metrology systems. Bruker's high-performance scientific instruments and high-value analytical and diagnostic solutions enable scientists worldwide to explore life and materials at molecular, cellular, and microscopic levels.
|
|
|
|
Date: Monday, September 23, 2019
Time: 1:00 PM - 2:00 PM EDT
Space is limited. Reserve your Webinar seat now at: https://attendee.gotowebinar.com/register/4478659805676565773
After registering you will receive a confirmation email containing information about joining the Webinar.
|
|
|
SYSTEM REQUIREMENTS
PC-based attendees
Required: Windows® 10, 8, 7, Vista, XP or 2003 Server
Mac® -based attendees
Required: Mac OS® X 10.6 or newer
Mobile attendees
Required: iPhone® , iPad® , AndroidTM phone or tablet, Windows 8 or Windows Phone 8
|
|
|
|
More from Photonics Media
|
|
| |
|
|