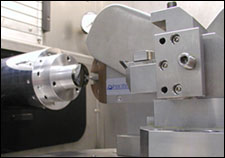
Part Centering Accessory
AMETEK Precitech Inc.
KEENE, N.H., April 22, 2010 — Ametek Precitech Inc.’s Part Centering Accessory uses a combination probe and reference surface to align the outer diameter of a vacuum-mounted, round, continuous surface component relative to the rotational axis of the work holding spindle to an accuracy of 2 µm in ≤15 s.
 The device mounts to the Z-axis tooling plate of a Precitech N250, N250UG, N700 or FF705 with UPx control. The device consumes slightly more real estate than a standard Precitech tool holder; however, it can be mounted in a location at the far end of the work envelope and requires very little X-axis travel to function.
The combination probe/reference surface is protected from the environment with a cover that automatically opens when the device is enabled and closes upon completion of the autocentering operation.
Hardware components include a linear variable differential transformer (LVDT) touch position sensor, a rigid mounting base and an automatic swarf cover. The software moves the machine axes to null the LVDT sensor on the outer diameter of the part, calculates the eccentricity and angle of eccentricity, rotates the spindle and samples outer diameter error motions, rotates the spindle to a high spot and uses the part centering accessory to bump the part into alignment, and resamples to determine improvement and pass/fail alignment.
https://www.precitech.com
/Buyers_Guide/AMETEK_Precitech_Inc/c12134